
Unsupported Browser
This page probably won't work great in Internet Explorer. We generally only support the recent versions of major browsers like Chrome, Firefox, Safari and Edge.
This page was written a few years ago
Some information needs to be updated, we will do it soon.
How do I read a damaged disk with dd for Windows?
Note that there are more methods to read a damaged disk.
Mac users, see the other dd article.
For Windows users, there is a good technique to create a disk image from the damaged disk or card, which is the first step towards recovery of footage.
Note that technique can also be useful to Mac users if the disk is not visible in the Finder, but is visible on a Windows PC.
reads
the card sector by sector
creates
a disk image file
In a nutshell, we use a small utility called dd for Windows that is able to read the raw data of a disk. (From now on, we will just use the generic word “disk”, and it can refer to a hard disk, a memory card or a SSD drive)
Under the premise that the disk is readable — Windows detects it when you plug the disk or insert the card in the reader — dd for Windows should be able to create a file with about the size of the disk.
Here is the process, step by step:
How to create the Disk Image
Related Topics
1. Download dd utility:
http://www.chrysocome.net/downloads/dd-0.5.zip
This program is free and distributed under GPL license.
For more information, refer to the product page.
2. Unzip it and make a copy on your Desktop.
3. Connect the damaged disk to the computer.
Your PC must detect it, otherwise dd won't work.
4. Open a DOS shell — the program called cmd.exe — and type the command:
dd --list
And you will get a list of the devices connected to your computer.
Here is what we get for example:
rawwrite dd for windows version 0.5.
Written by John Newbigin
This program is covered by the GPL. See copying.txt for details
Win32 Available Volume Information
\\.\Volume{aef46cf9-3e3d-11de-b8c6-806d6172696f}\
link to \\?\Device\HarddiskVolume3
fixed media
Mounted on \\.\c:

\\.\Volume{aef46cf8-3e3d-11de-b8c6-806d6172696f}\
link to \\?\Device\CdRom0
CD-ROM
Mounted on \\.\d:

\\.\Volume{6f41f4b2-d11a-11de-b318-001d4f88486c}\
link to \\?\Device\Harddisk1\DP(1)0-0+5
removeable media
Mounted on \\.\f:
Don't be afraid, it's just a list of the devices connected to your computer.
Here the interesting device is the F:\ volume described as removable media:
This is the card that we want to recover. Take note of the corresponding volume name:
\\.\Volume{6f41f4b2-d11a-11de-b318-001d4f88486c}
On your screen, the volume name will have a different name, but it will also start with \\.\Volume{ and end with }.
This name will be used in step #6.
5. Verify that you have enough space available on your hard disk.
The rule of the thumb is that a 4GB card will produce a 4GB file, a 120GB hard disk will need 120GB, and so on.
6. Type the command below to read your disk.
Of course, you will replace the volume name inside the curly brackets below, by the one that you have noted in step #4:
dd if=\\.\Volume{6f41f4b2-d11a-11de-b318-001d4f88486c} of=c:\usb.img bs=1M
This command creates a file called c:\usb.img that is a carbon-copy of the damaged disk.
It can take a long time. For 1GB, it can take one minute or more. For 120GB, it can take several hours.
Note that you can monitor the size of the c:\usb.img file as it grows from 0 to the size of the disk: This will give you an idea of the progress.
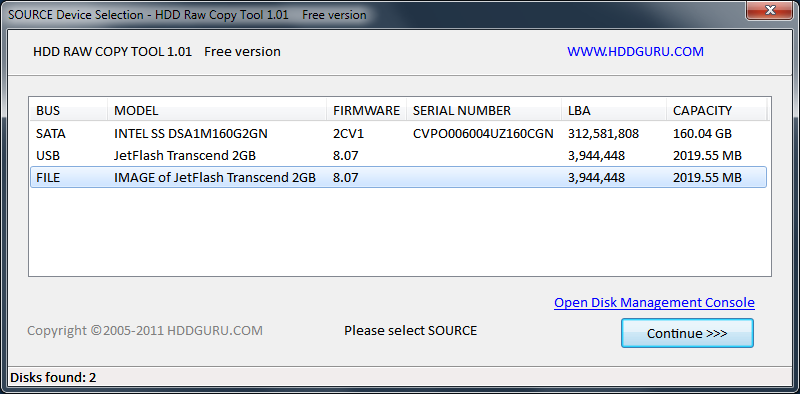
HDD Raw Copy Tool
For people afraid of using the command line, we recommend this utility by HDDGuru:
It achieves the same as dd, but through a less intimidating interface.
How do I extract video from my .img file?
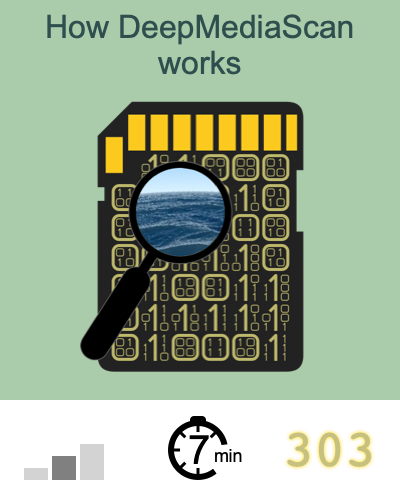
New method:
DeepMediaScan, bundled in Treasured,
is now the
preferred method
Now, if everything went fine, you should have a .img disk image whose size is similar to the disk capacity.
If the disk still contains video, the footage must now be inside your disk image file as well.
Your .img file will now be split into tiles, like an archaeological excavation grid. We will search for video inside each tile.

1. Figure out how many tiles
If the average size of the video file that you want to recover is 500 MB, divide your .img file into tiles of 500 MB. For example, a 32 GB card will give you: 32000/500 = 64 tiles.
You can reduce the number of tiles in the first pass, then narrow down once you have verified that your footage is present.
2. Split your .img file into tiles
You can use free software like HJSplit to perform this task.
3. Run Treasured diagnostics on each tile
Treasured is a tool to preview and repair video inside a corrupt file.
By trying every tile, you will map all the video present in damaged disk.
Diagnostics are free.
4. Use Treasured to repair interesting tiles
Treasured can repair the tiles into playable videos.
5. Rebuild entire video clips
If two or more tiles contain footage from the same clip, you can use software like HJSplit to join the tiles and then use Treasured to repair the clip in one shot.